
SEO strategies (if you do this, you’re doing more then 80% of website owners)

You’re a small business owner, with a Squarespace website and you want to know alllll the tea on how to make it look 🤌🏽🤌🏽🤌🏽 without the designer price. Welcome to The Squarespace Series: your ultimate guide to designing like a pro and creating a website that turns heads (and maybe a little envy too). In episode 3 we’re talking SEO strategies (if you do this, you’re doing more then 80% of website owners).
SEO, aka Search Engine Optimization, refers to how well your website will rank on a search engine like Google. If your goal is to land on page 1 (duhhh) then follow these steps we’ve put together to optimise your Squarespace website that will massively improve your chances of getting there.
01. Add your Site Title
Seems obvious, however if you’re using a custom logo, you have the ability to add more information about your business that will show up in search engines. Open Website Editor > Edit Site Header > Site Title & Logo.
You can update your Site Title with your business name and some additional information to support search results.
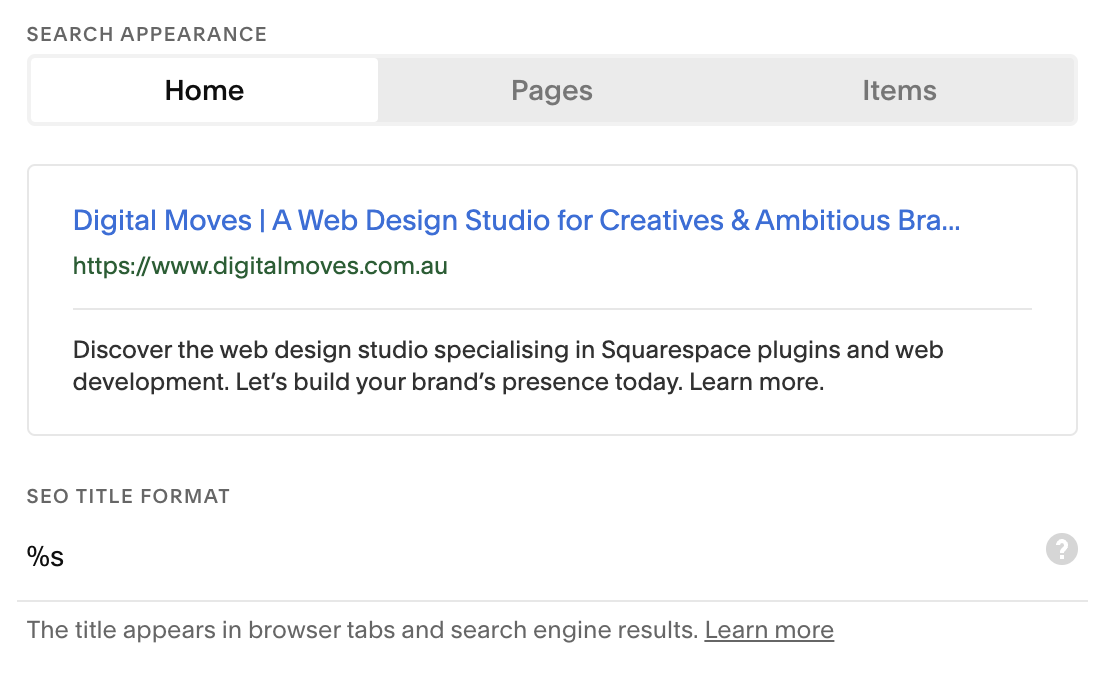

02. Add your Site Description
Your site description should include a brief & short description of what your business is about. It’s the first thing users will see and search engines will use this description to index your site. So it’s a great spot to utilise your keywords but keep it natural and within your brand TOV.
To add a site description, go to Settings > Marketing > SEO Appearance, then on the Home tab, scroll down to the SEO Site Description field.
💡Keep your word count under 280 characters, otherwise it will be cut off.

03. Add Page Descriptions
It’s important to add descriptions for each page on your website for SEO optimisation. A short summary of what the page is about, including keywords that support your potential ranking in search engines. Keep it engaging and encouraging so potential users click onto your website!
To add a meta description to a page on your site, click on the cog icon next to the page name in the left hand sidebar, then select Settings > SEO
04. Add your Business Information
Okay, probably obvious but you’d be surprised that this one gets missed. This is especially important if you are a business with a physical store and opening hours, Google can index all this information. Regardless, if you’re IRL or URL you should be adding your business information into your Squarespace site.
To update your business information, go to Settings > Selling > Business Information and add your info.
05. Optimise your Images
Image size: Google lives a quick load site, so if your images are massive, it’s not going to play well. Aim for 250KB for small images and 500KB for larger images like banners and backgrounds.
Image names: Name all your images appropriately before you upload them to your website. The filename can give Google clues about the subject matter of the image. Also, no spaces, just dashes!
Good: brandname-black-persian-kitten.jpg
Bad: IMG00023.JPG.That doesn’t mean keyword stuffing. Keep your filenames descriptive and straightforward.
Good: dog.jpg
Bad: dog-puppy-pup-pups-puppies.jpgImage File Type
JPEGs are the best format for photographs, whereas PNG’s are best for line drawings, text, etc. GIFs are best for moving images.
Alt text: Adding alt text will increase your site’s accessibility for any visitor using assistive screen readers. It also helps search engines identify and classify the content on your website, ultimately helping your rankings. Add a brief description that is specific, includes keywords and is up to 125 characters.
06. Check your URL Slugs
While Squarespace automatically uses the page name as the default URL, here are some tips to optimise your URLs. Remember if you’re duplicating pages, the URL will be the same as the original page with a number at the end.
Short & sweet: 4-6 words at most
It’s gotta be relevant: Keywords and words that describe the page
Make it make sense: Simple, easy to ready and understand
07. Set up a Custom 404 Page
Errors happen, users might end up on nonexistent pages on your site. Create a custom 404 page to reroute visitors back on your website. Check out some cool custom 404 pages here. It can be funny, silly and even on brand. Some elements such as a search bar, contact form, frequently visited links and even silly GIFs will greatly improve your visitor’s experience and more likely to keep browsing, despite the blunder.
To create a custom 404 page, add a new page to the Not Linked pages section of your site, customise it just like a regular page, then scroll to the bottom of your pages panel and go to System Pages > 404 Page and select the page you just created.
08. Connect with Google Search Console
When you are launch ready, connect your website with Google Search Console. A free SEO tool where you can track and monitor how your website is performing. You’ll need a Google profile to do this, you can connect right here.
09. Utilise h1 tags effectively
From a design perspective, you would assume Heading 1 is the largest font on your website. From a SEO perspective, it’s the tag that Google prioritises to understand your website. Let’s play out an example:
Heading 1
Welcome!
Heading 2
A Squarespace web design and development studio
for service-based small business.
If we’re tagging “Welcome!” as Heading 1, this doesn’t give Google much information on what the business is about. Instead you want to save Heading 1 (essentially the second bit of copy) for your most important text block on each page.
If you are using different text styles on different pages you can target them so they are styled the way you want them.
//h1 tags//
//home page//
#block-ID h1 {
  font-family: var(--heading-font-font-family);
  font-size: 30px;
  line-height: 1;
}Add the block ID of your text block followed by h1, then you can style the font exactly how you’d like it. Repeat the above for all pages which need individual styling of a h1 tag.
Enjoy & happy coding!